It’s important to keep your rabbits entertained to avoid boredom. We look at how to kit out their run with a homemade rabbit maze to keep them active whilst having fun.
It's important for your rabbits to have a sizeable hutch to keep them safe and dry; however, giving them access to a large, secure run allows them to play and socialise with the freedom to dig too. Read on to see how to make a wooden maze for your rabbits' run to beat bunny boredom.
The RSPCA recognises that, under the Animal Welfare Act 2006, it's our duty as pet owners to meet the environmental and behavioural needs of our bunnies. It suggests that “enrichment within rabbit housing” can help to achieve this.
Rabbits are clever, inquisitive animals that need to be stimulated every day. Bored rabbits can over-eat leading to obesity, which can cause heart problems and diabetes. They may also groom themselves to pass the time, meaning hairballs can build up, blocking their digestive tracts. If you're worried that your rabbits may be displaying signs of boredom, be sure to speak to your vet.
By keeping your bunnies entertained, you can ensure that they stay happy and healthy. Homemade rabbit toys will keep them on their paws, and these are cheap and quick to make from household items like cardboard boxes. Rabbits enjoy solving puzzles, such as working their way around obstacles or through tunnels, especially when there are healthy treats hidden inside too!
But if you're looking to create something sturdier to withstand springtime showers, why not have a go at building this bunny maze for their run that they can enjoy for months to come. You don't need to be an expert at DIY to give it a go - follow the steps below to create a customised maze to prevent boredom.
To make the bunny maze, you will need:
Tools
- A jigsaw, table-saw, or hand saw
- A drill with a selection of drill-bits, including a countersink bit
- A set square
- A tape measure
- Mesh snippers
- A heavy duty stapler
- A workbench or suitable surface for sawing
Note: Rabbits are sensitive to sudden, loud noises, so consider where you use your power tools.
Materials
- About 6m of batten, 20mm x 30mm
- 1 x large sheet of suitable sheet material, 12mm thick
- 1m2 of welded mesh
- Bunny-safe paint for weatherproofing (optional)
Instructions
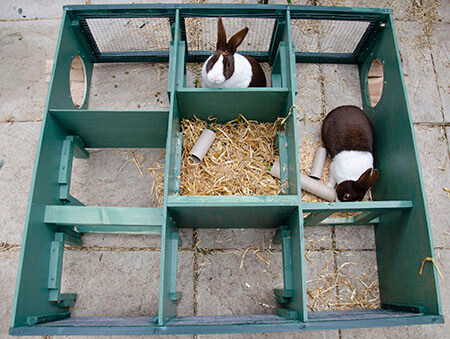
1. Make a plan: You can make your maze as large as your run permits! This design is for a 99cm squared, 3x3-room maze, but the steps below also apply for larger designs. Decide where the inner walls will inter-sect; this design positions the internal walls at 33cm from the outer walls (this is important in step 4 below).
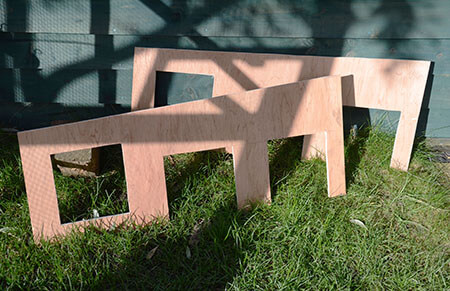
2. Make the front and rear outer wall panels: Using a set-square and straight edge, mark and cut your materials. The size shown is 99cm long, 30cm high at one end, 35cm high at the other. Remember to use appropriate safety gear, especially when handling power tools.
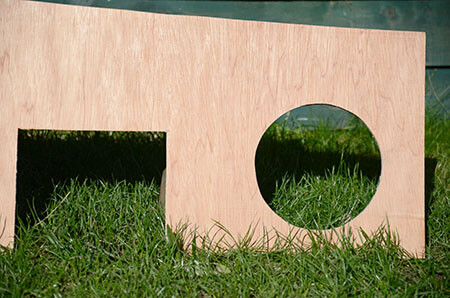
3. Create the entrances in the front and rear wall panels:
- Mark up the entrances on the front and rear walls, positioning these in the centre of each section.
- Cut the entrance holes in the front and rear walls.
- Frame the entrance holes with battens to prevent chewing. This design uses a mixture of battens and natural wood.
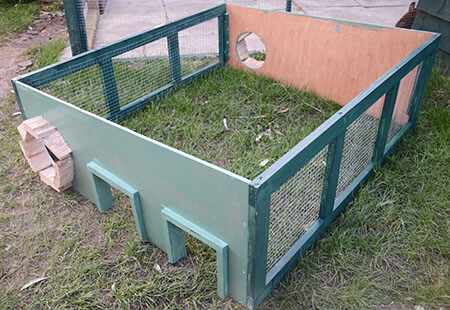
4. Mark and cut the frames for the two side walls, then attach welded wire mesh to the inside ‘windows’, ensuring you don’t leave any sharp edges exposed. One of the side wall frames should be 99cm long by 30cm high, the other side wall frame should be 99cm long by 35cm high. Remember to attach the vertical battens in the correct position for the inner walls, as described in step 3. If you plan to weatherproof the side walls, do so before attaching the mesh. Set these aside for later.
5. Create the remaining internal walls. A tip to make this easier is to roughly cut the shapes from your sheet material, then clamp them together, like a sandwich, in order to cut them to exactly the same size. If you’re planning to paint these panels, do this now. At this stage, repeat step 3c, above.
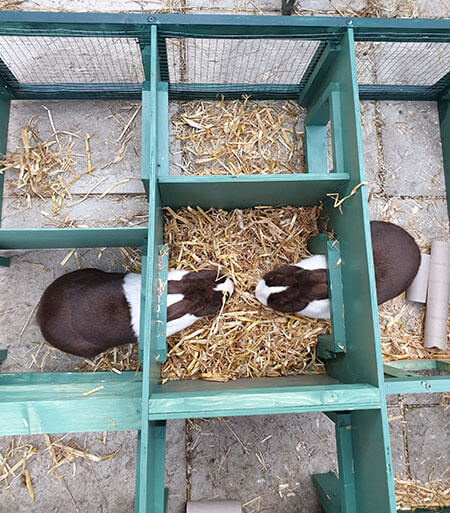
6. Assemble the outer walls and inner walls making sure there aren’t any sharp edges exposed. You can have as many or as few inner ‘doors’ as you wish.

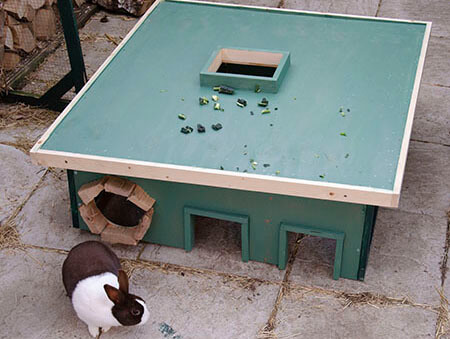
7. Make the roof panel:
- Cut a panel that’s 105cm squared
- Turn the maze upside down, and lay it on the roof panel. Placing it centrally on the roof, mark the roof along the inside edge of the outer walls with a pencil. Cut and attach four wooden blocks to the inside of the roof panel, to ‘seat’ the roof in the right place – This makes it easy to remove and replace for cleaning and inspection.

- Frame the roof panel with protective battening. Don’t forget to drill several 10mm holes in the batten facing the lower edge, to allow moisture to run off.
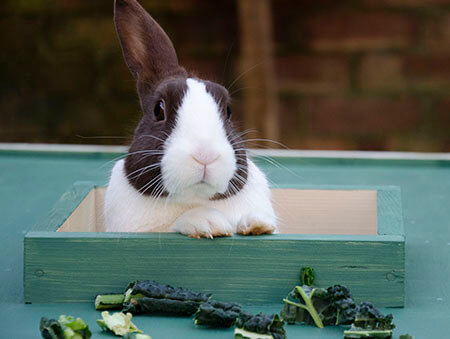
Now your rabbit maze is complete, you can let your bunnies explore! Try filling one or two of the internal rooms with straw or natural willow, and let them forage for a healthy treat. As with any chewable material, keep an eye on wear and tear. Any edges that are likely to get chewed should be made from bunny-safe wood, and if you decide to weatherproof the maze, ensure you use non-toxic, pet-safe paint.

We’d love to see your bunny maze designs, or puzzles and toys you’ve made at home to keep your rabbits entertained. Share your photos on Facebook or Instagram using the hashtag #pethoodstories
Thanks to the generosity of our customers, the Petplan Charitable Trust has been able to contribute vital funds to animal charities to help get them through the Covid-19 crisis. £150,000 donated to the Association of Dogs and Cats Home (ADCH) Emergency Coronavirus Appeal and another £50,000 donated to the Covid-19 Equine Rescues Emergency Fund. We work in partnership with 1,200 animal charities across the UK and know this money is desperately needed to ensure they can continue to support the animals in their care.
We understand these are challenging times for our customers. If you have any questions about how your policy may be affected by COVID-19, as well as any changes to your cover, please have a look at our FAQs for the latest updates.